In a prolonged ‘no-Internet’ situation, devices running Android are very versatile and offline-friendly. This article will show you how to archive third party apps for later installation onto Android devices while offline.
Why archive these applications instead of just installing them on the device and using it offline, as-is? You may run into a situation where the device needs to be factory reset. The device may completely fail and require replacement. You may wish to share these apps with another person in the same no-internet situation. Whatever scenario may present itself in the future, being able to manage files on Android and backup applications are useful skills to have.
Wipe the device
If this is a device you use regularly and have configured to your liking, you should create a backup. Obviously if there are personal files like photos or documents on the device, those should be backed up with extra care. You could proceed without wiping the device initially but since you will have to do so again later in this process, you may as well do it now as well to ensure that things will go smoothly.
Go through the setup process as you would with any device fresh out of the box. Connect to the Internet, sign into your Google account, etc. We will be accessing the Internet to download and install all of the apps that you may want to use in the future on this device and others. You will be wiping the phone again soon so it is not necessary to restore a backup at this time or transfer data from another phone or device. We just want to get it up and running enough to be online and able to access the Play Store.
I will be using a Pixel 3 XL and will include screenshots from that device. Because so many manufacturers offer Android phones and tablets, and they all love to customize the software and interfaces, your device will behave slightly differently and you may face different challenges and situations. That said, the overall process outlined in this post will be similar for all Android devices. You may just have to spend a little more time searching out solutions to random issues online.
Installfest!
Once your device is up and running it is time to install the applications you wish to archive for use in the future. Go to the Play Store and install any and all free and/or paid apps that you would like to use in the future. Keep in mind that many applications and games don’t really offer much value in offline mode. Many mobile games only offer online multiplayer. Pokemon Go and PUBG are bad choices, for example. Other applications that you use daily may be surprisingly crippled without Internet access which is why the offline testing phase of this tutorial is so critical.
I recommend installing a podcast app and a competent file manager App. Antennapod and Material Files are good options, respectively. You can install both from the Google Play Store at the time of publishing. They are also available, along with MANY other great apps, via F-Droid, an alternative app store that focuses on open source and free software. More on installing from alternative sources later. For the purposes of this tutorial, I have chosen to install Grand Theft Auto: Vice City, a paid app from my library, and Badland, a free game from the Google Play Store.
Launch Those Apps!
Some apps will download and install a ‘launcher’ that doesn’t include all the data necessary to function. Upon the first launch, the rest of the application will be downloaded and installed to the phone. Before proceeding to the next step, launch all the applications you have just installed and make sure they function as expected.
Be aware that we will be extracting all the data associated with the applications. Any podcasts you subscribe to or game progress you save at this time will be backed up. So it is a good idea to launch the apps to make sure they function properly while also leaving the installation as ‘vanilla’ as possible.
Back that App Up
This is part of the process that will vary from device to device. Again, I am using a Pixel 3 XL and will go into detail on how to back up the applications to this device. The concepts will translate to other devices and with a little know-how and Googling you should be in good shape. You may also want to enlist the help of a nerdy friend should you get stuck. TAKE GOOD NOTES!
Android apps have up to three components: the APK, the Data folder and the OBB folder. The APK is the application itself, the program. The files used to install Android apps are also in this APK format. For larger apps, games in particular, there will be an OBB folder which contains supplemental information that the app needs to function. In the case of games this could include media assets, levels, etc. The Data folder usually contains configuration and game save information. Each developer may choose to use these folders however they wish so this model may not always be 100% accurate but for our purposes, this is basically how it is supposed to work.
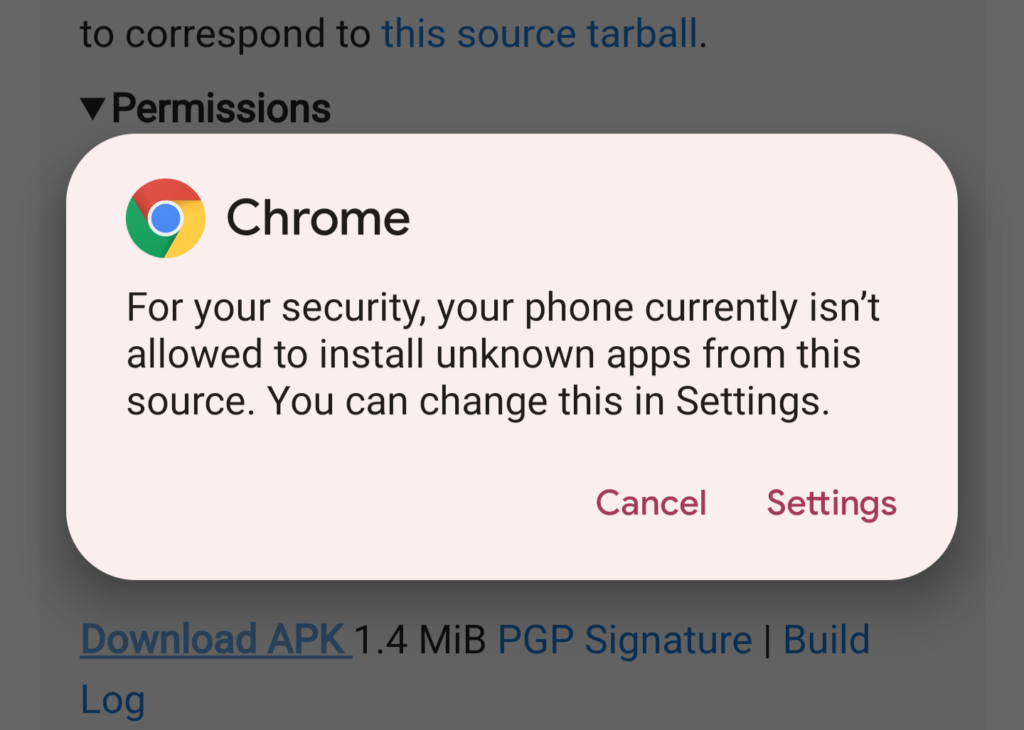
First let’s get the APK needed to re-install the app after wiping our device or to install it on another device. The easiest way I have found to do this is to install APK Extractor available from F-Droid.org. You can get there by following this link. If it is no longer available, you can download the installer from this website here. You will be warned that this type of file (APK) can harm your device and asked if you want to keep it anyway. You do. Once it is downloaded, open it. If given a choice, use the Package Installer to open the file. Your device will likely let you know that it is not configured to allow applications to be installed from certain sources, Chrome in this case. Follow the prompts to change the settings in your device to allow installation from Chrome and install the app.
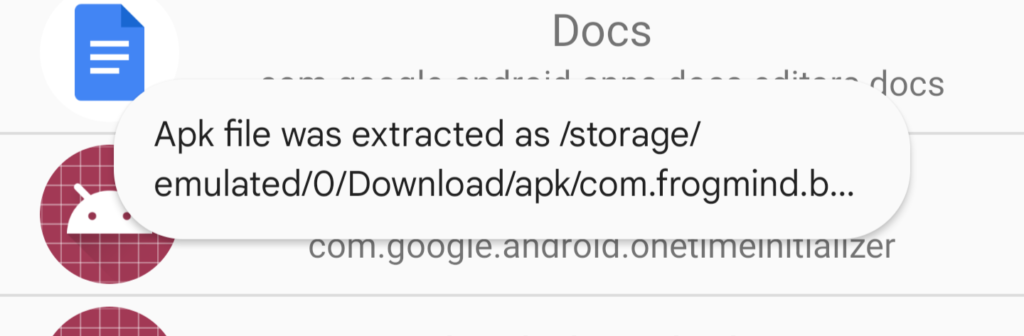
Upon opening APK Extractor, you will be presented with a long list of applications currently installed on the device. While most of them are services that handle the phone functionality, updaters, storage management and the like, you will also find the applications you have recently installed. The names are sometimes a bit cryptic but the app icons will help you find what you are looking for. You can also search for the app by name but that can be hit or miss. The files will be saved to a newly created ‘apk’ folder in the Downloads folder on your device. Use Material Files to browse there and see your saved APK files.
Time to get Tricky
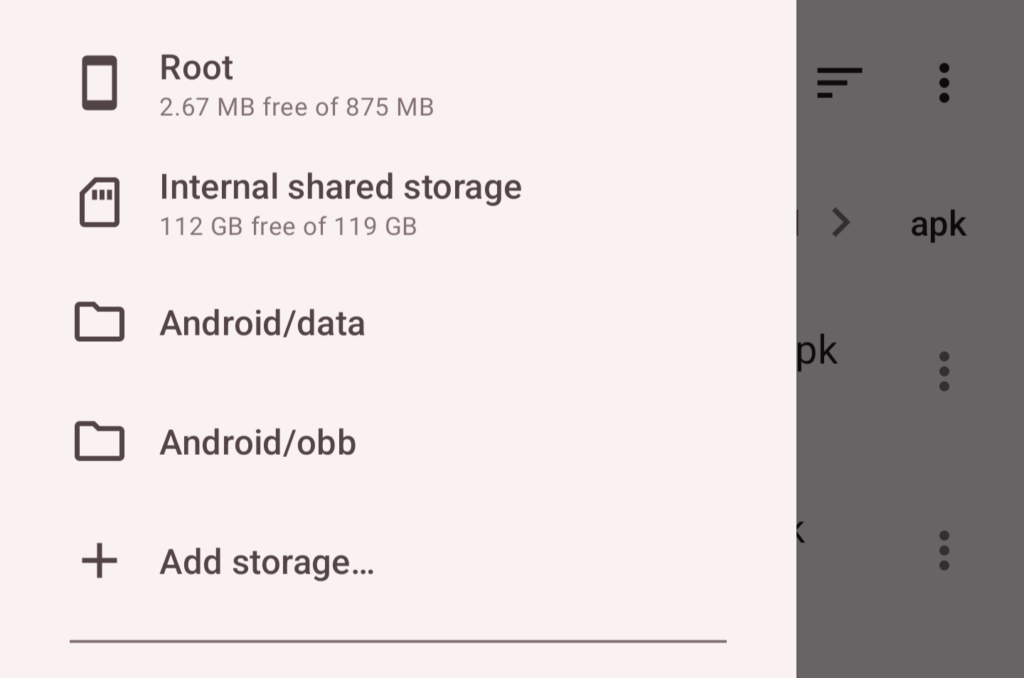
Exporting APKs was the easy part, saving the data and OBB folders can be trickier. The Android operating system will try to prevent you from accessing these files. Material Files can get to them in a roundabout sort of way. Go into Material Files and hit the menu button at the top left. Choose ‘Add storage…’ and tap Android/data. Click the blue ‘Use this folder’ button at the bottom and click ‘Allow’ to allow Material Files to access the folder. Repeat this with the Android/obb folder. Material Files can now access files from both of these system folders but we still may not be able to get to them via USB-C or FTP (more on this presently).
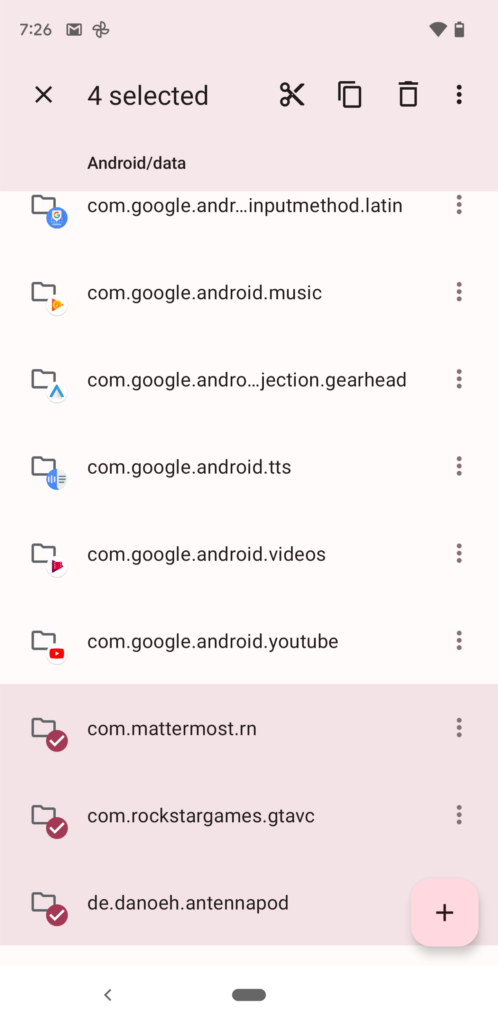
We need to make a copy of the applications’ data and OBB folders outside the Pixel’s Android folder. In Material Files, navigate to the Android/data folder we just added. Find the data folder for the first APK you extracted. In my case, it is Badlands. The name of the data folder will match (more or less) the extracted APK; the Badlands folder is called com.frogmind.badland. Long pressing any folder will put Material Files into ‘select mode’. A check mark will appear on the folder’s icon. You can now select more folders by tapping them. Select all the data folders for the APKs you have extracted. Remember, not all apps will have a data folder. At the top of the screen you’ll see how many folders you have selected along with the Cut, Copy and Trash buttons. Tap Copy, it looks like a stack of papers. Your selection will go away and the paste button will appear at the bottom of the screen. It looks like a clipboard.
Use the menu button at the top to navigate to the Download folder and tap the + at the bottom right. Create a folder called ‘data’. Open the folder and press the paste button at the bottom of the screen. The folders you selected will be duplicated. Navigate to the Android/obb and repeat the process, creating a Downloads/obb folder and pasting the obb folders into it. Don’t get the data and obb folders mixed up, that would be a headache later.
Getting It Off the Device
It is possible to use a USB-C to USB-A adapter to connect this Pixel 3 XL to external storage such as a USB flash drive or external hard drive. The USB-C port on many Android devices can be used for a number of things, not just file transfer. You will likely need such an adapter during the restoration process so I will cover this more near the end of the post. Because it is important to know multiple ways of doing things, I’ll be using Material Files’ built in FTP server to backup the files we need this time.
You will need your computer and Android device to be on the same network to access the files you want to back up. If you don’t have a computer, you can use the USB-C direct connection method mentioned above.
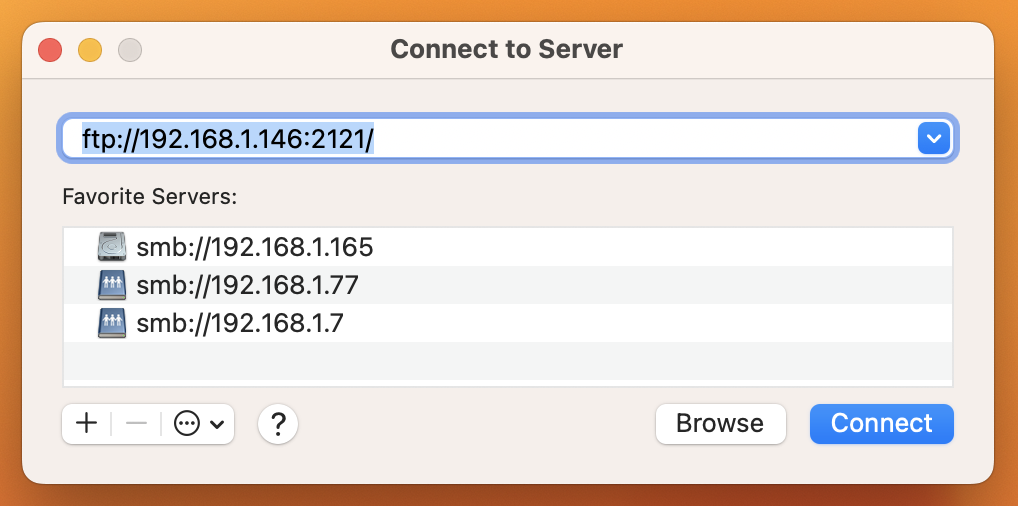
In the Material Files menu, select ‘FTP server’ near the bottom. Tap the first toggle titled ‘Status’ to start the FTP server. You may want to turn off ‘Anonymous login’ and set a username and password if using this feature for other purposes but, for now, it’s fine allowing anonymous connections. Note the URL right underneath ‘Status’
Using a Mac
While in Finder (or at the Desktop) press command+k to bring up the ‘Connect to Server’ dialog and type the URL from Material Files EXACTLY as it appears in the app. Choose ‘Connect as a Guest’ and click connect.
We can now see the folders in the root of our Pixel’s storage. Navigate to Downloads and we can see the apk folder that was created by the APK Extractor app. You’ll also see the data and obb folders you created. Drag these folders to your computer to store them safely off the phone.
Using Windows
Open File Explorer and right-click on This PC; select Add a Network Location from the context menu. Choose a Custom Network Location and enter the URL EXACTLY as it appears in the app. Leave ‘Log on anonymously’ checked and click the Next button. Choose a name for the server and click Next. Click Finish.
We can now see the folders in the root of our Pixel’s storage. Navigate to Downloads and we can see the apk folder that was created by the APK Extractor app. You’ll also see the data and obb folders you created. Drag these folders to your computer to store them safely off the phone.
Now What?
Well… That depends. The next step is to test our ability to restore the apps in a no-Internet situation by factory resetting the phone and setting it up without connecting to the Internet. If you have a test network set up that is disconnected from the Internet, you can use the FTP method to transfer the files back to the device. Otherwise, you could transfer the files via USB to avoid connecting to the Internet.
Because we have covered copying, pasting and generally navigating the Android file system with Material Files, I’m going to cover the next steps in a more abstract fashion.
First, restore the device to factory settings and set it up without connecting to any network. If your device has a SIM card installed, remove it before resetting.
To re-install the apps, we are going to reverse the backup process. Because Material Files isn’t installed by default on your newly wiped device, we cannot use the FTP connection method to restore our files. We will have to copy the files to a USB drive and use a USB-C to USB-A adapter to connect the drive to the Pixel 3 XL. Some USB flash drives have a USB-C connector and can be connected directly. Alternatively, if you have a Gucci test network set up with a WordPress or NextCloud server configured, you can use Chrome to download the files. More on that in another post.
Installfest Round Two
Connect the USB drive to your phone. Swipe down from the top of the display and tap ‘General USB Drive’ Find the device near the bottom of the screen and navigate to your files. Select the apk, data and obb folders and copy them into your phone’s Download folder. Navigate using the Files app to your Material Files APK and install the app.
You may otherwise choose to simply find the Material Files APK and install it directly from the USB. You can then add the data and obb folders to the Material Files menu as before, fire up the FTP server and transfer the rest of the files and folders back to the device via that method.
The Material Files app will install and run just fine without restoring data or obb folders. Many apps will not, however, and this has to be done in a particular order to be successful.
- Install the APK – DO NOT LAUNCH THE APP
- Copy the data and obb folders to the respective folders
- Launch the app
And there we have it. I would strongly encourage you to make an offline copy of this article and also document this process for your particular device as the details will differ slightly. And when the time actually comes to make this all happen… You won’t have access to the Internet for troubleshooting advice.